Using Redis for caching in Asp.Net Core

I am an enthusiastic software developer focusing on C#, .NET, Asp.NET, Azure and Angular.
In this previous article, we learned about caching in Asp.Net Core. We talked about In-Memory cache and Distributed cache using SQL Server cache.
This article will discuss how to use Redis for caching in Asp.Net Core.
What is Redis?
Redis (REmote DIctionary Server) is an open-source, high-performance, in-memory that allows us to store and retrieve data in our applications.
Used primarily as a database, cache, or message broker, it also supports several data structures such as hashes, lists, sets, sorted sets, bitmaps and others.
Azure Cache for Redis
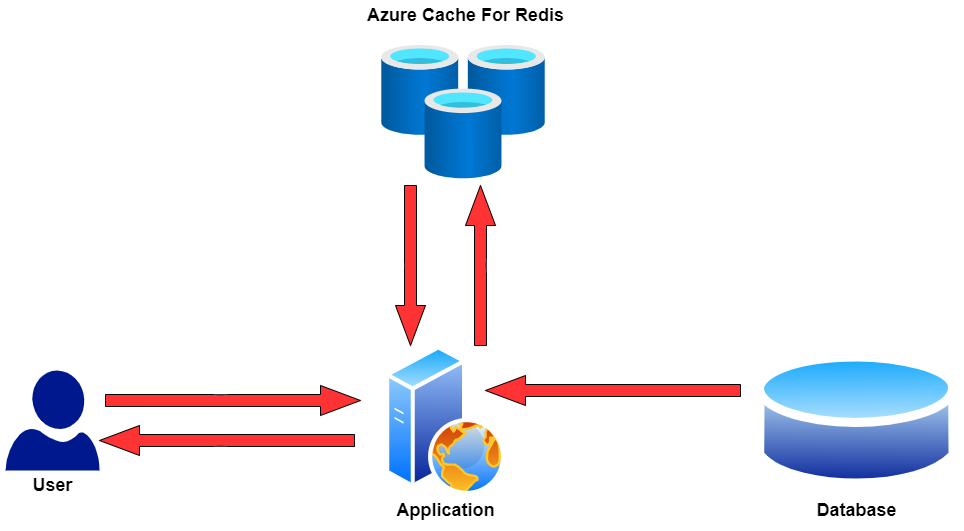
Azure Cache for Redis provides an in-memory data store based on the Redis software. Redis improves the performance and scalability of an application that uses backend data stores heavily. It can process large volumes of application requests by keeping frequently accessed data in the server memory, which can be written to and read from quickly.
Azure Cache for Redis can be deployed as a standalone or with other Azure database services, such as Azure SQL or Azure Cosmos DB.
Configure Azure Cache for Redis
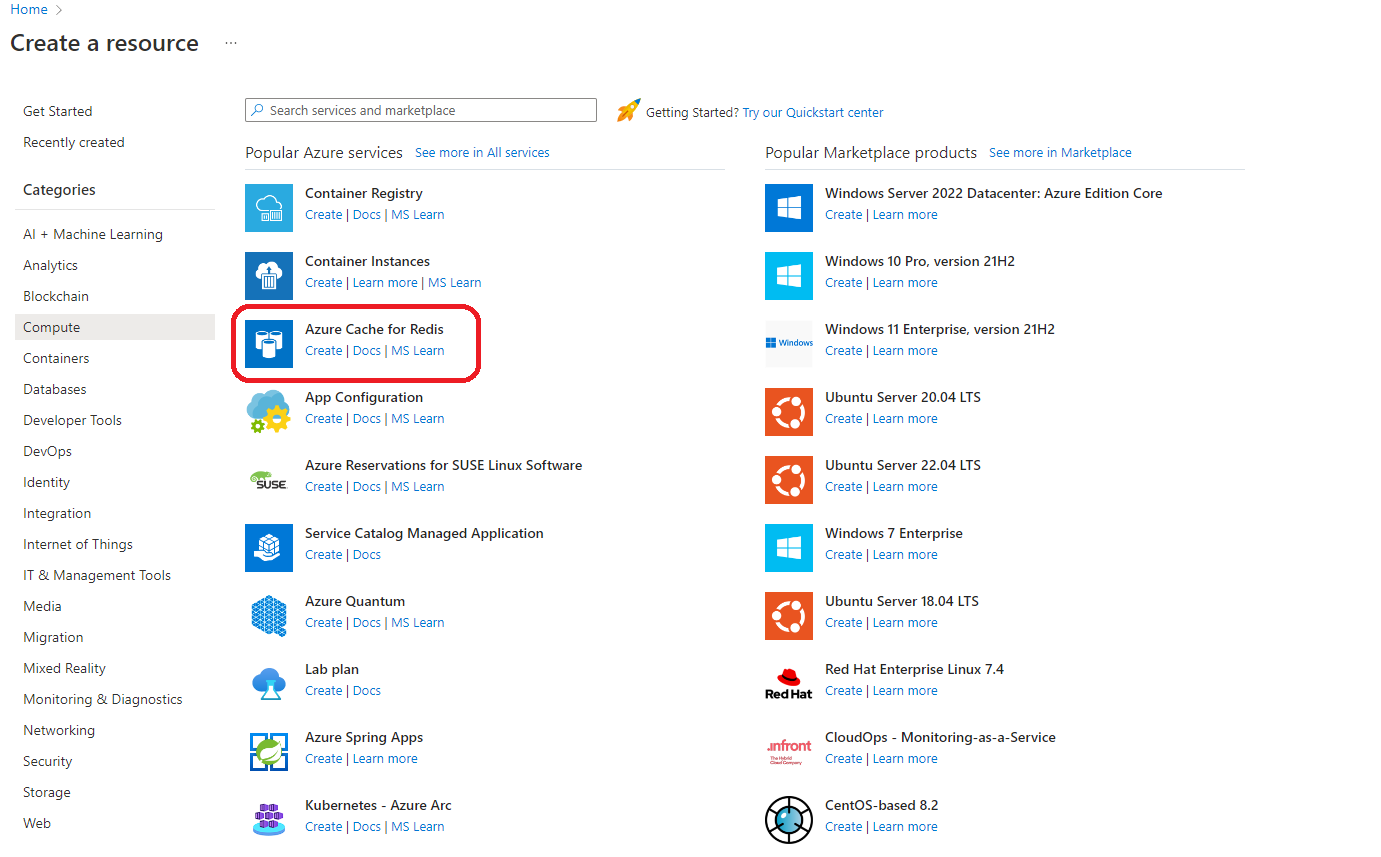
To create a new Azure Cache for Redis, first, we need to sign in to the Azure portal. You can create one for free if you don't have an account. After that, click on Create a resource and then Compute. You should see the item Azure Cache for Redis. The following image shows what you should see.
In the New Redis Cache page, we need to specify the subscription plan, the resource group, the DNS name, the server location for using Redis, and the cache type. Please feel free to use the following image for reference.
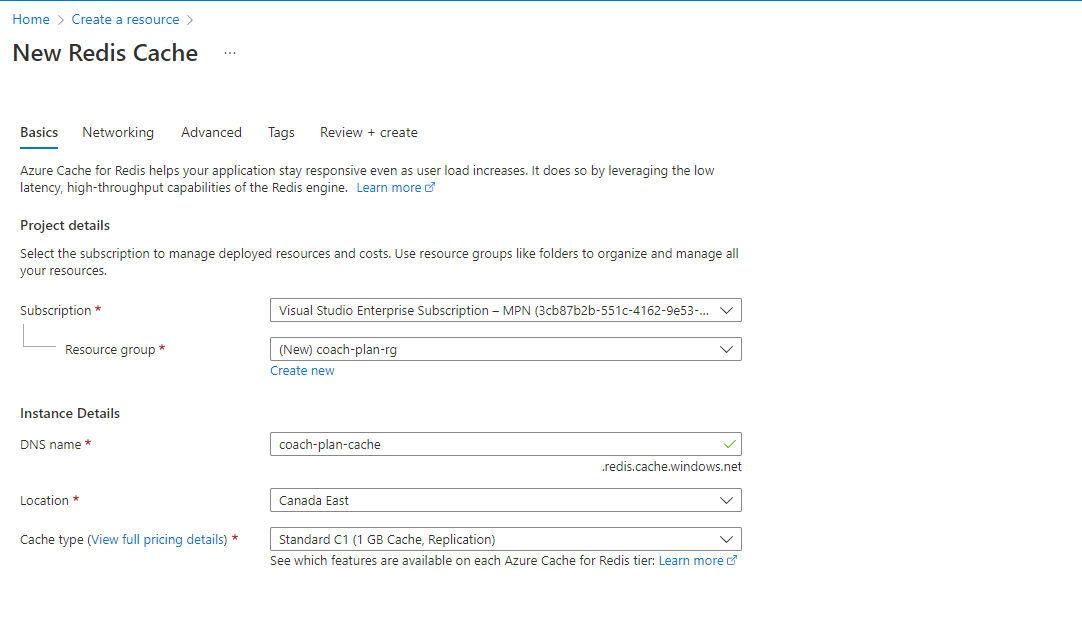
In the Advanced tab, we can define the Redis version to be used. After that, we can click on Review + Create to create the Redis resource in Azure.
Implementation
First, we need to install the NuGet package Microsoft.Extensions.Caching.StackExchangeRedis, and then we can register the Redis in our services.
builder.Services.AddStackExchangeRedisCache(opt =>
{
    opt.Configuration = builder.Configuration.GetConnectionString("Redis");
});
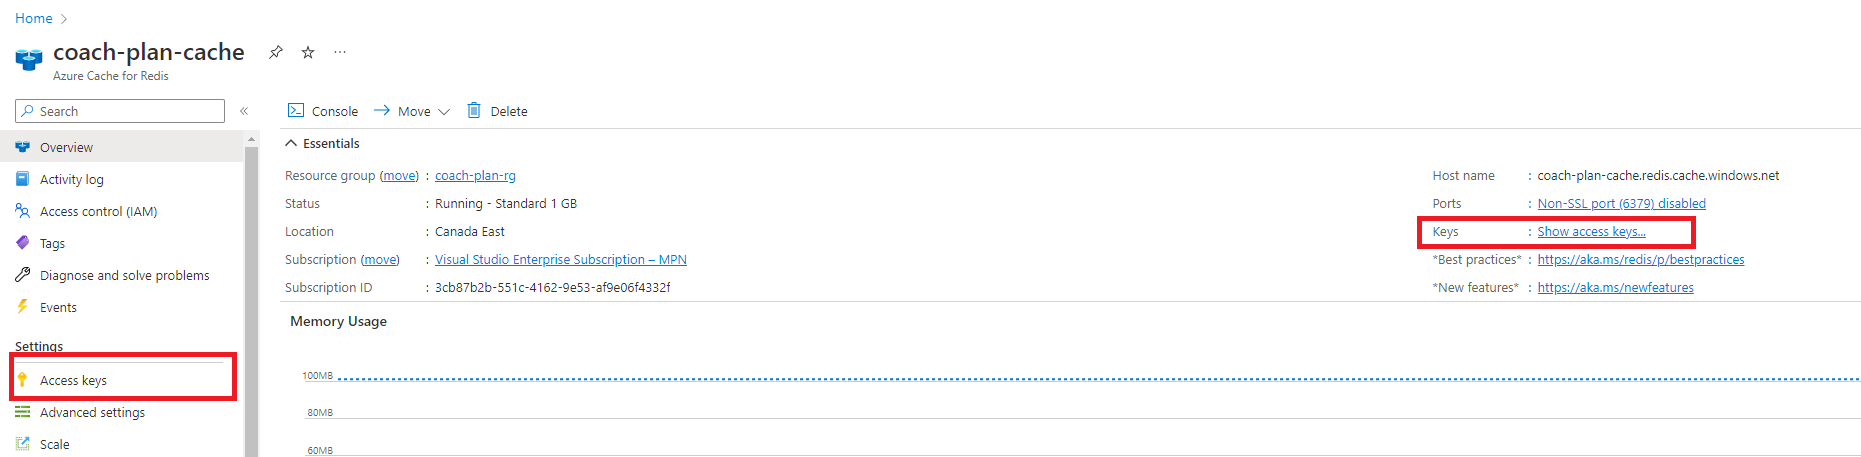
We will need the string connection of the Redis in Azure. We need to access the resource and click on the link for Access Keys, the image below shows where you can find the links.
The next step is to define the connection string in the appsettings.json file.
  "ConnectionStrings": {
    "DefaultConnection": "Server=localhost\\MSSQLSERVER01; Database=CoachPlan; Trusted_Connection=True; MultipleActiveResultSets=true",
    "Redis": "Add the Primary connection string here."
  },
Now, we are going to change the implementation of our services. The package that we are using contains the implementation of the IDistributedCache interface so that we can inject this interface into our services.
    private readonly IMuscleRepository _muscleRepository;
    private readonly IDistributedCache _distributedCache;
    private readonly JsonSerializerSettings _jsonSerializerSettings;

    public MuscleService(IMuscleRepository muscleRepository, IDistributedCache distributedCache)
    {
        _muscleRepository = muscleRepository;
        _distributedCache = distributedCache;

        _jsonSerializerSettings = new()
        {
            ReferenceLoopHandling = ReferenceLoopHandling.Ignore
        };
    }
The following code shows the implementation of the GetById method. So, before going to the database to get the data, we verify if it is cached and then return it; otherwise, the data will be fetched from the database and cached.
To get the cached data, we need to use the method GetStringAsync which will return the Json of the cached data if it exists.
To send the data to Redis, we use the method SetStringAsync, which uses the data we want to cache as a parameter.
    public async Task<GetMuscleDto> GetById(int id)
    {
        string key = $"muscle-{id}";

        string cachedMuscle = await _distributedCache.GetStringAsync(key);

        Muscle muscle = null;

        if (string.IsNullOrEmpty(cachedMuscle))
        {
            muscle = await _muscleRepository.GetById(id);

            if (muscle is not null)
            {
                await _distributedCache.SetStringAsync(key, JsonConvert.SerializeObject(muscle, _jsonSerializerSettings));
            }
        }
        else
        {
            muscle = JsonConvert.DeserializeObject<Muscle>(cachedMuscle);
        }

        return muscle.ToGetDto();
    }
In case we want to use the cache expiration, we have two options:
Absolute expiration means no matter the frequency of accessing cached data, and it will be removed after a fixed time.
Sliding expiration provides a way to remove the cached data which are not frequently accessed. If an object's sliding expiration of 30 seconds is enabled, it will expire only if the data was not accessed in the last 30 seconds.
We can create an instance of DistributedCacheEntryOptions and define the type of cache expiration we want to use. The following code shows how to create and use the instance in the method SetStringAsync.
 var expiration = new DistributedCacheEntryOptions
 {
    AbsoluteExpirationRelativeToNow = TimeSpan.FromSeconds(30),
    SlidingExpiration = TimeSpan.FromSeconds(25)
 };

 await _distributedCache.SetStringAsync(key, JsonConvert.SerializeObject(muscles, _jsonSerializerSettings), expiration);
Wrapping Up
If you don't need more Azure Cache for Redis, remember to delete it in the Azure Portal.
You can find the complete code on my GitHub.