Google Login Integration with .NET MAUI
I am an enthusiastic software developer focusing on C#, .NET, Asp.NET, Azure and Angular.
Social login uses information from social networking sites to facilitate logins on third-party applications and platforms. The goal is to make the login process easier for users. The process is designed to simplify sign-in and registration experiences, providing a convenient alternative to mandatory account creation, allowing users to skip the registration procedures.
In summary, social sign-on it helps users and developers. In this post, we are going to learn what is necessary to implement a Google authentication with .Net MAUI.
How does social login work?
Social login can be done in three steps:
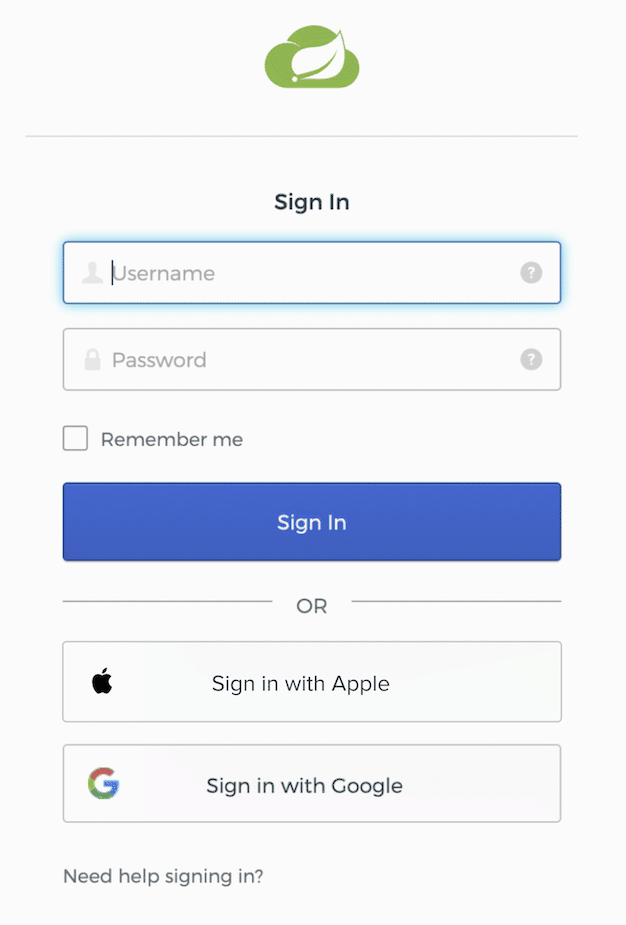
The user enters an app and selects their chosen social network.
The social network provider receives a login request and authenticates the user. At this stage, users need to accept the access permissions of the app.
The user will get access to the app once the social provider has confirmed their identity.
The Google OAuth 2.0 endpoint supports applications that are installed on devices such as computers, mobile devices, and tablets.
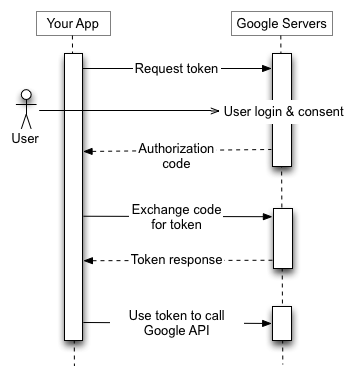
The authorization sequence begins when your application redirects a browser to a Google URL; the URL includes query parameters that indicate the type of access being requested. Google handles the user authentication, session selection, and user consent. The result is an authorization code, which the application can exchange for an access token and a refresh token.
The diagram shows the process described above.
Google project creation
Any application that uses OAuth 2.0 to access Google APIs must have authorization credentials that identify the application to Google's OAuth 2.0 server.
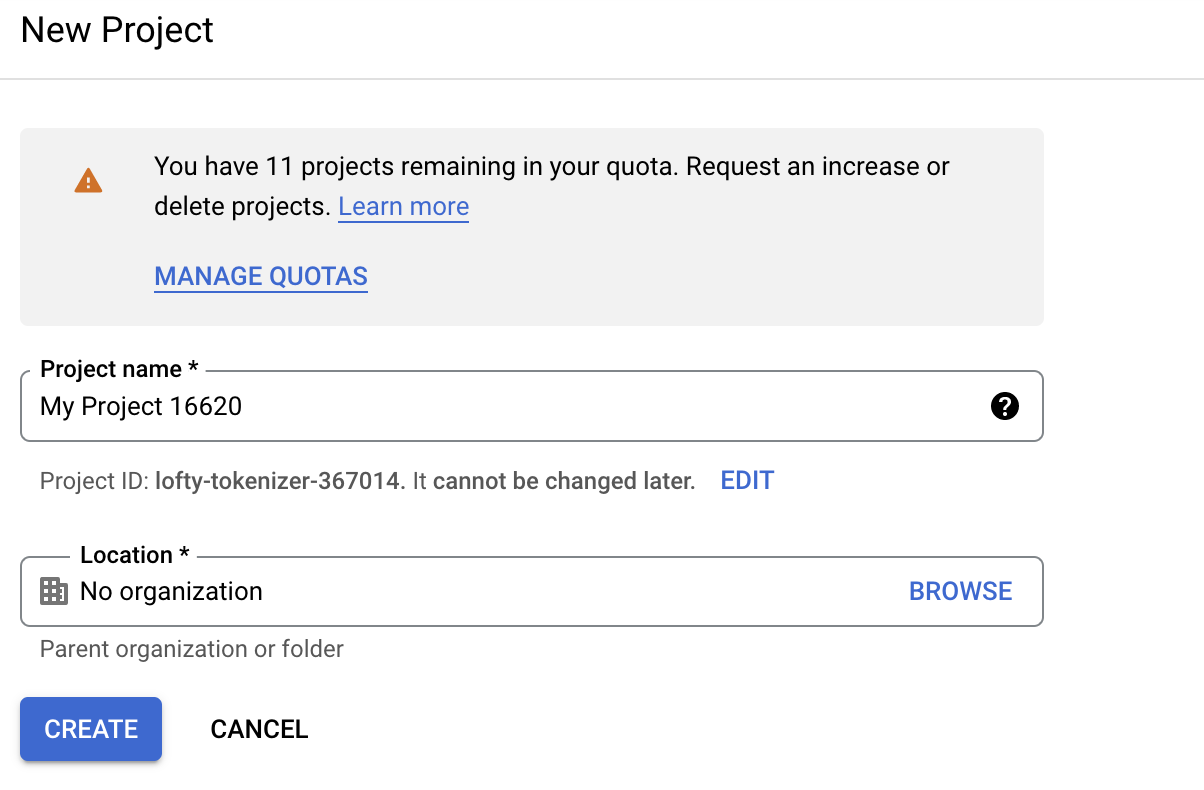
The first step is to create a new project in Google Cloud. Accessing the link you should see something like the image below.
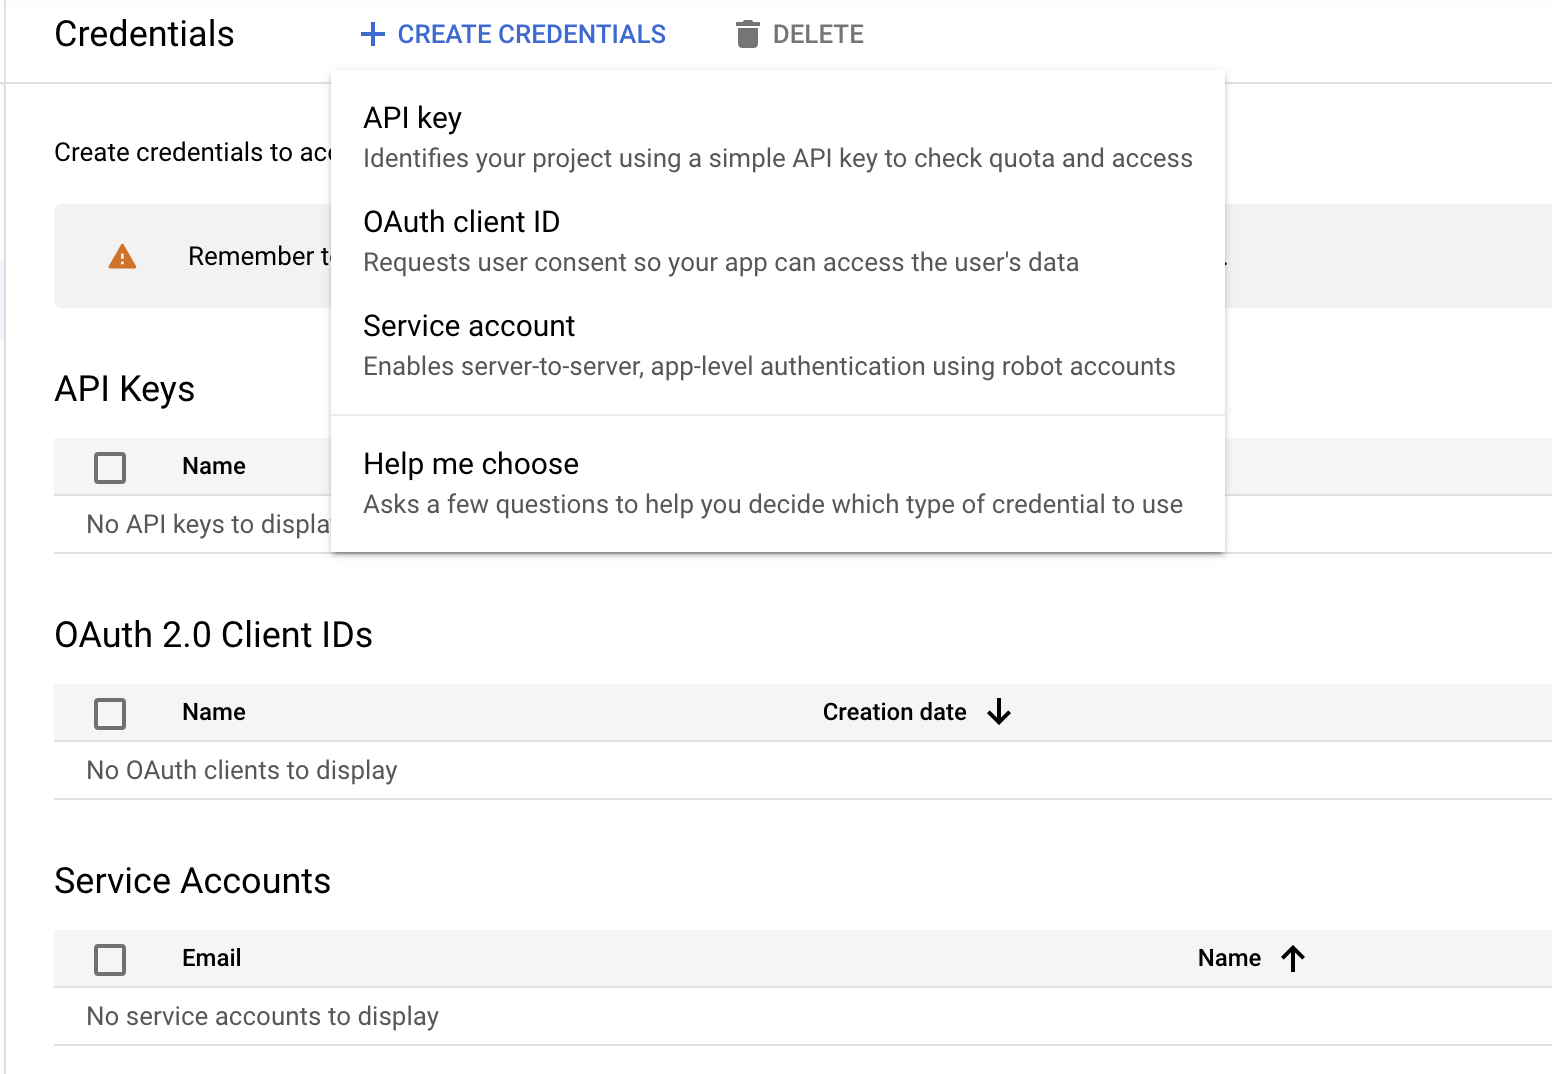
The next step is to create the Credentials. Using this link, we need to click on Create Credentials and then OAuth Client ID.
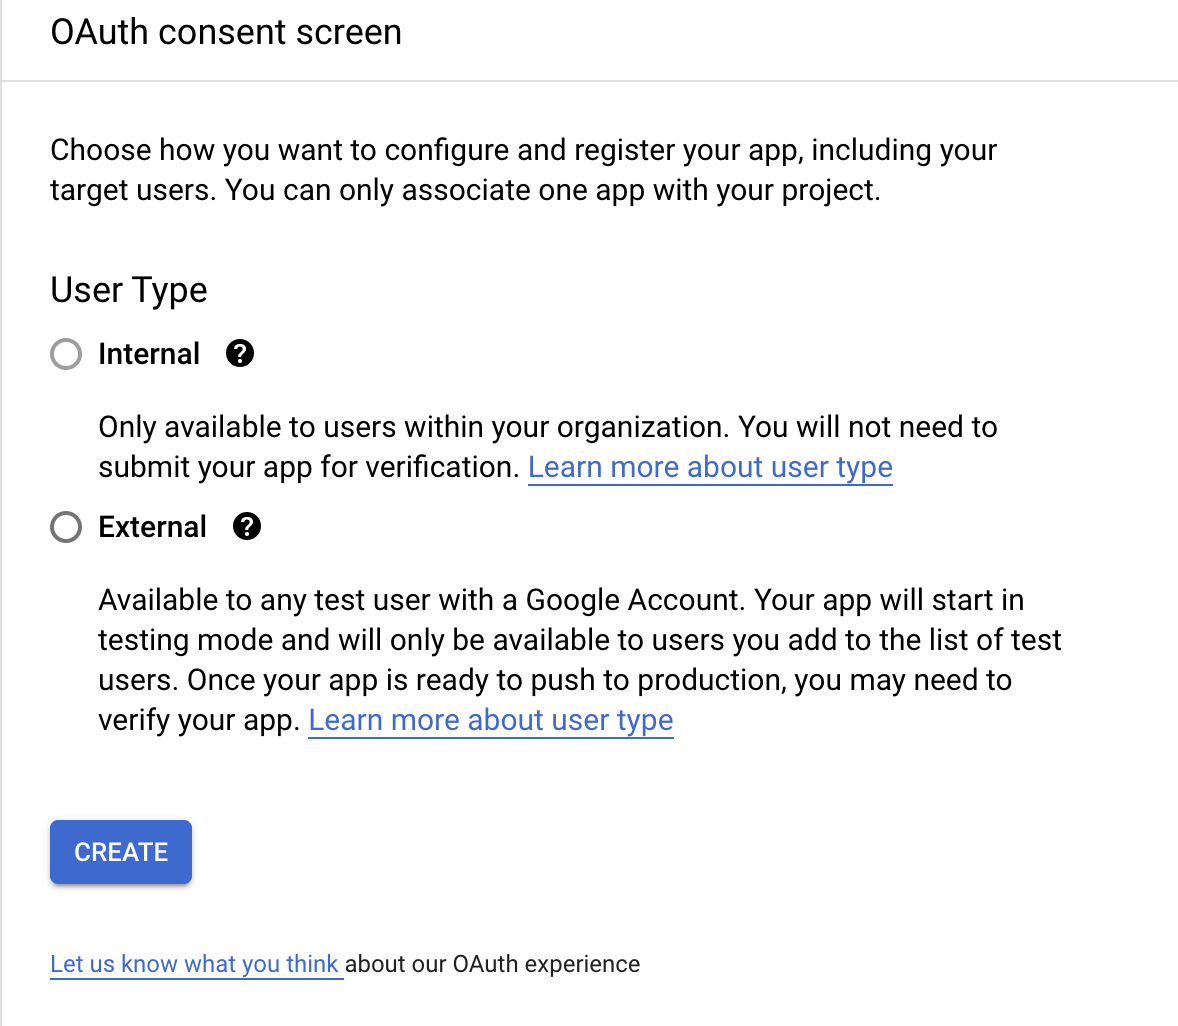
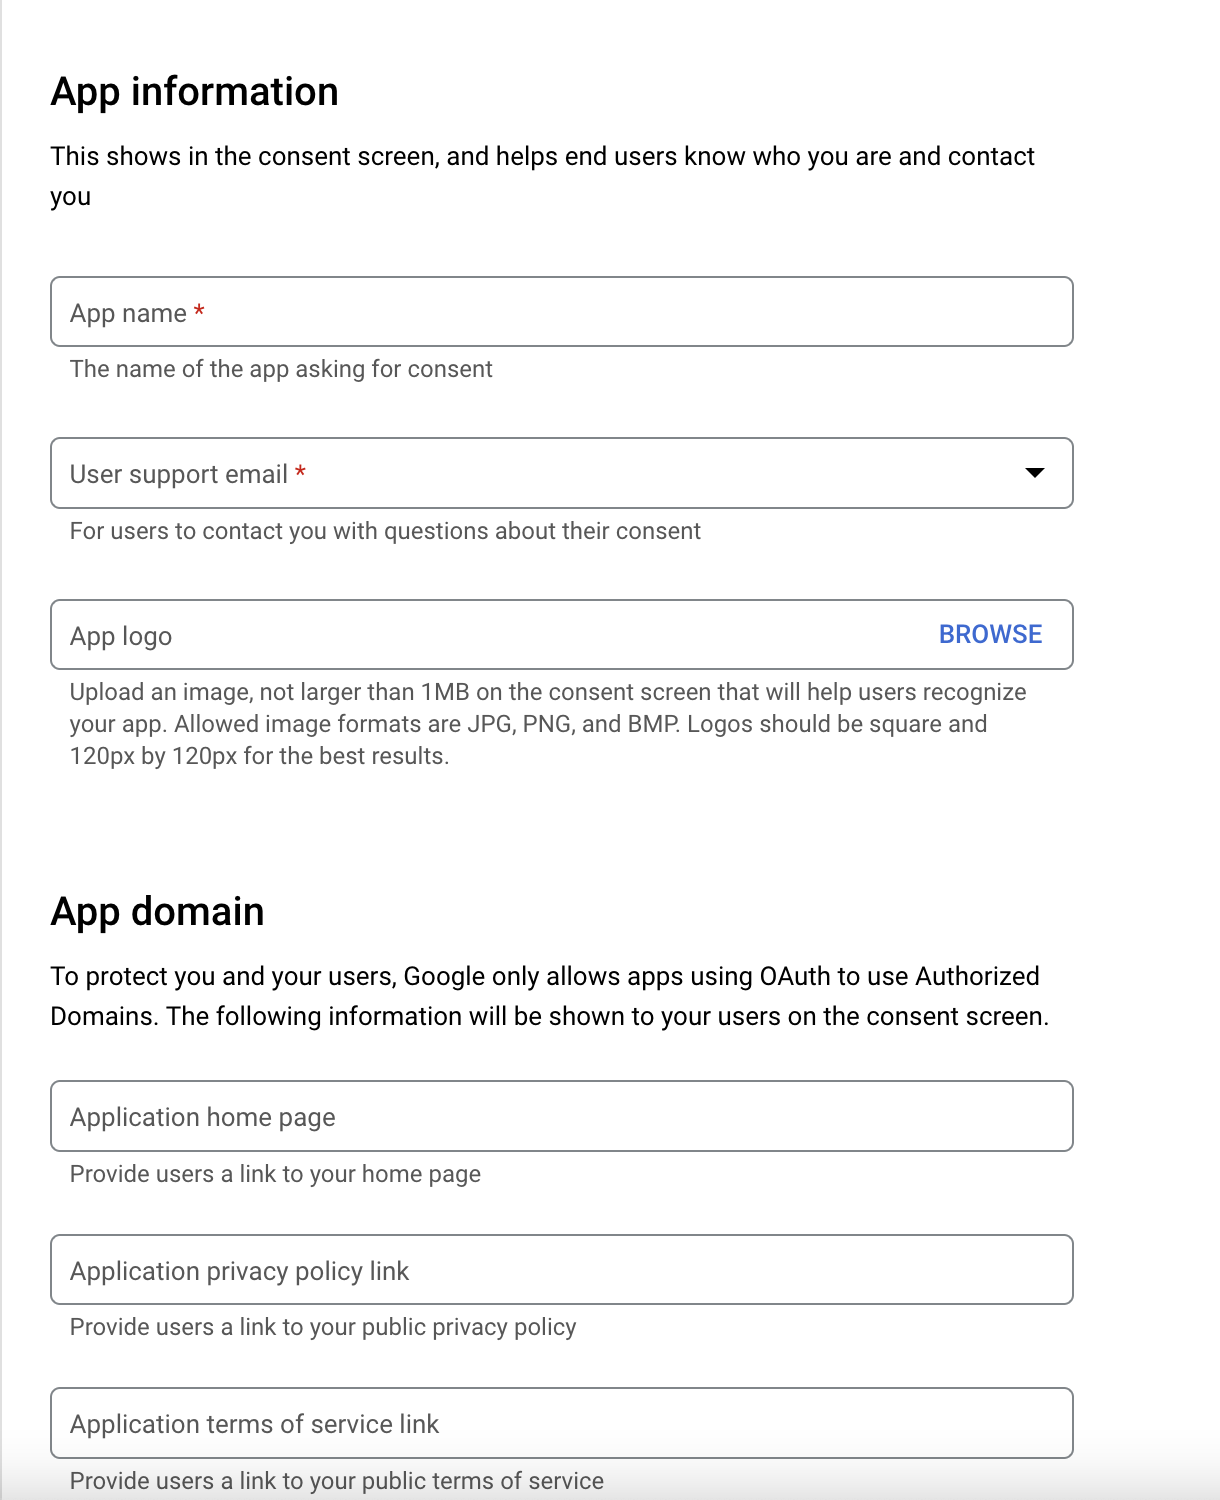
The Consent and App Information pages should be fill in with information that is necessary for your mobile application.
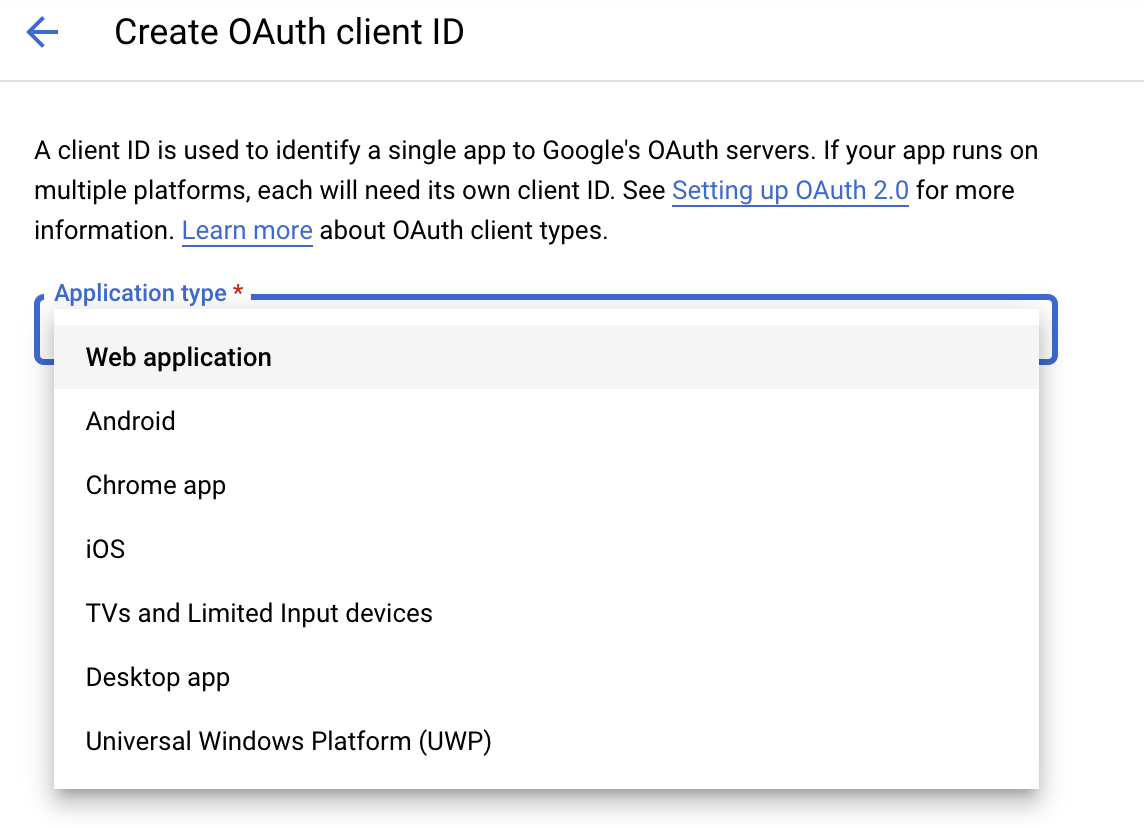
After defining the information of our application, we can finalize the creation of the Client Id, choosing Android in the application type field.
In the following page we need to provide the package name of the application that can be found in the Manifest.xml file and the SHA-1 fingerprint.
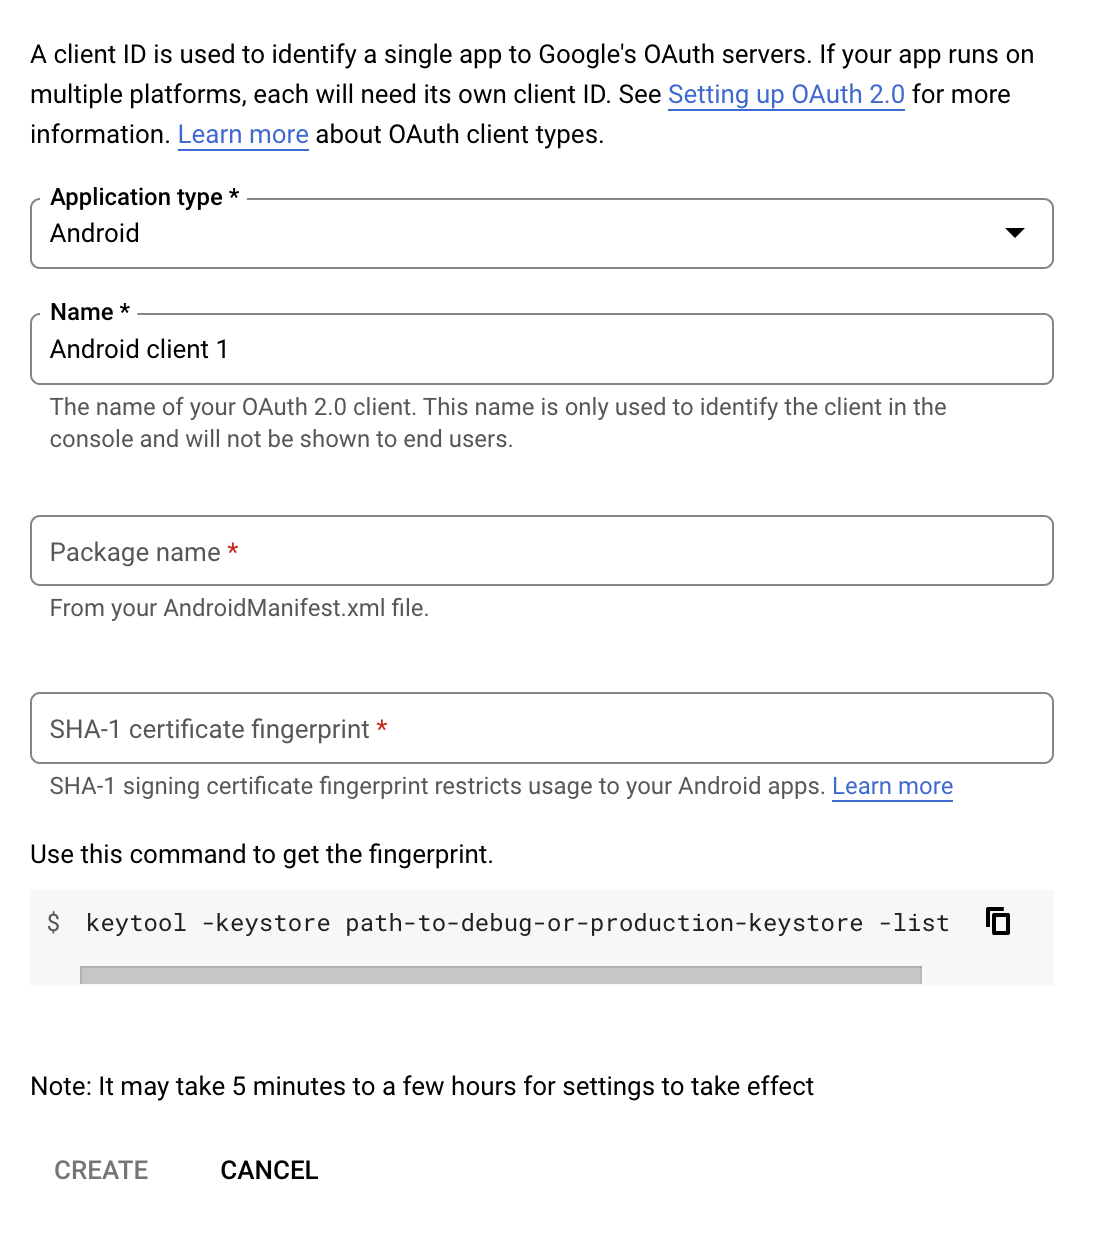
Regarding the SHA-1 fingerprint, you can get the fingerprint code using the steps in the following link.
After the process, a json file will be generated with some information that we will use to authenticate. Below there is a sample of the json file.
{"installed":{"client_id":"1076424481260-0tkbph8l6l0gebqcbahnkk4v4oio589f.apps.googleusercontent.com","project_id":"lofty-tokenizer-367014","auth_uri":"https://accounts.google.com/o/oauth2/auth","token_uri":"https://oauth2.googleapis.com/token","auth_provider_x509_cert_url":"https://www.googleapis.com/oauth2/v1/certs"}}
Let's code
For this post, we will use WebAuthenticator. The WebAuthenticator API takes care of launching the url in the browser and waiting until the callback is received. If the user cancels the flow at any point, a TaskCanceledException is thrown.
First, we will define the URL's necessary for the authentication process. Most of the values will be found in the clientId json file. The callback URL can have any value, here I chose to use the same value of the android package name.
The scopes can be defined during the App Registration process in Google Cloud, for this example I am using only one.
var authUrl = $"{Constants.Google.auth_uri}?response_type=code" +
                    $"&redirect_uri=com.maui.login://" +
                    $"&client_id={Constants.Google.client_id}" +
                    $"&scope=https://www.googleapis.com/auth/userinfo.email" +
                    $"&include_granted_scopes=true" +
                    $"&state=state_parameter_passthrough_value";


var callbackUrl = "com.maui.login://";
The following code will open the browser, starting the authentication process.
var response = await WebAuthenticator.AuthenticateAsync(new WebAuthenticatorOptions()
                        {
                            Url = new Uri(authUrl),
                            CallbackUrl = new Uri(callbackUrl)
                        });
Like we saw in the beginning of the post, after the user authenticates and consents, the app will get the Authorization Token that will be used to request the Access Token using the Token URL that can be found in the clientId json file.
var codeToken = response.Properties["code"];

var parameters = new FormUrlEncodedContent(new[]
{
        new KeyValuePair<string,string>("grant_type","authorization_code"),
        new KeyValuePair<string,string>("client_id",Constants.Google.client_id),
        new KeyValuePair<string,string>("redirect_uri",callbackUrl),
        new KeyValuePair<string,string>("code",codeToken),
});

HttpClient client = new HttpClient();
var accessTokenResponse = await client.PostAsync(Constants.Google.token_ur, parameters);

LoginResponse loginResponse;

if (accessTokenResponse.IsSuccessStatusCode)
{
     var data = await accessTokenResponse.Content.ReadAsStringAsync();
     loginResponse = JsonConvert.DeserializeObject<LoginResponse>(data);
}
The full code of the authentication is displayed below.
using Android.App;
using Article_001.Models;
using Newtonsoft.Json;
using System;
using System.Collections.Generic;
using System.Linq;
using System.Text;
using System.Threading.Tasks;

namespace Article_001.ViewModels
{
    public class MainPageViewModel
    {
        public Command LoginCommand
                => new Command(async () =>
                {
                    var authUrl = $"{Constants.Google.auth_uri}?response_type=code" +
                    $"&redirect_uri=com.maui.login://" +
                    $"&client_id={Constants.Google.client_id}" +
                    $"&scope=https://www.googleapis.com/auth/userinfo.email" +
                    $"&include_granted_scopes=true" +
                    $"&state=state_parameter_passthrough_value";


                    var callbackUrl = "com.maui.login://";

                    try
                    {
                        var response = await WebAuthenticator.AuthenticateAsync(new WebAuthenticatorOptions()
                        {
                            Url = new Uri(authUrl),
                            CallbackUrl = new Uri(callbackUrl)
                        });

                        var codeToken = response.Properties["code"];

                        var parameters = new FormUrlEncodedContent(new[]
                        {
                        new KeyValuePair<string,string>("grant_type","authorization_code"),
                        new KeyValuePair<string,string>("client_id",Constants.Google.client_id),
                        new KeyValuePair<string,string>("redirect_uri",callbackUrl),
                        new KeyValuePair<string,string>("code",codeToken),
                    });


                        HttpClient client = new HttpClient();
                        var accessTokenResponse = await client.PostAsync(Constants.Google.token_ur, parameters);

                        LoginResponse loginResponse;

                        if (accessTokenResponse.IsSuccessStatusCode)
                        {
                            var data = await accessTokenResponse.Content.ReadAsStringAsync();

                            loginResponse = JsonConvert.DeserializeObject<LoginResponse>(data);
                        }
                    }
                    catch (TaskCanceledException e)
                    {
                        // Use stopped auth
                    }


                });

    }
}
For Android application it is necessary to create an Activity that inherits from WebAuthenticatorCallbackActivity and it needs to have in its IntentFilter DataScheme the same value as callback url.
    [Activity(NoHistory = true, LaunchMode = LaunchMode.SingleTop, Exported = true)]
    [IntentFilter(new[] { Android.Content.Intent.ActionView },
     Categories = new[] { Android.Content.Intent.CategoryDefault, Android.Content.Intent.CategoryBrowsable },
      DataScheme = "com.maui.login")]
    public class WebAuthenticatorActivity : WebAuthenticatorCallbackActivity
    {
        protected override void OnCreate(Bundle savedInstanceState)
        {
            base.OnCreate(savedInstanceState);
        }
    }
Another setting for Android application is adding the query tag for CustomTabsService in Manifest.xml file.
<?xml version="1.0" encoding="utf-8"?>
<manifest xmlns:android="http://schemas.android.com/apk/res/android">
    <application android:allowBackup="true" android:icon="@mipmap/appicon" package="com.maui.login" android:roundIcon="@mipmap/appicon_round" android:supportsRtl="true"></application>
    <uses-permission android:name="android.permission.ACCESS_NETWORK_STATE" />
    <uses-permission android:name="android.permission.INTERNET" />

    <queries>
        <intent>
            <action android:name="android.support.customtabs.action.CustomTabsService" />
        </intent>
    </queries>

</manifest>
You can find the full code on my GitHub.