Securing Asp.Net Core Minimal APIs with a custom Middleware

I am an enthusiastic software developer focusing on C#, .NET, Asp.NET, Azure and Angular.
In this post we will create a custom middleware to secure a minimal API.
Authorization
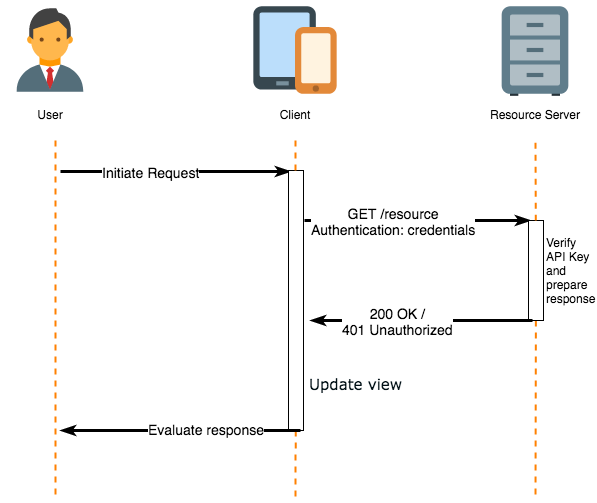
To ensure that client requests access data securely, APIs use authorization. If authentication refers to proving correct identity, authorization refers to allowing a certain action.
The authorization process can involve authenticating the sender of a request and confirming that they have permission to access or manipulate the relevant data.
There are a variety of authorization models such as: API key, Bearer token, Basic auth, OAuth and others.
Api Key
The API is a key-value pair that you usually include either in the request headers or query parameters. The API key mainly functions as a way to identify the person making the API call (authenticating you to use the API).
Middleware
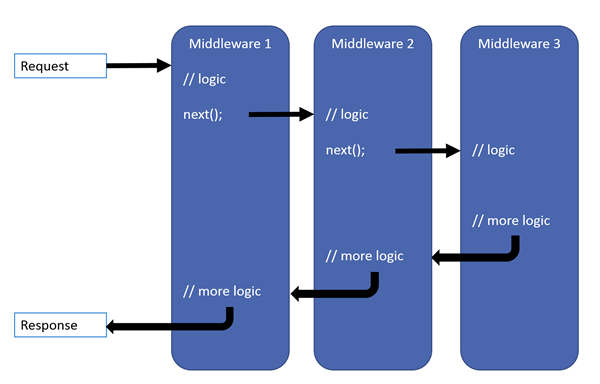
Middleware is a component (class) in an application pipeline used to handle requests and responses. Each component:
Chooses whether to pass the request to the next component in the pipeline.
Can perform work before and after the next component in the pipeline.
The following diagram demonstrates how a middleware pipeline works, each middleware can perform operations before and after the next one.
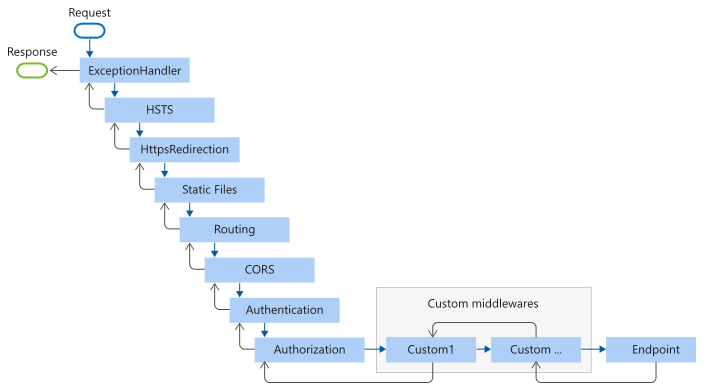
When an ASP.Net Core Web API is created it uses some default middlewares. The following diagram shows the complete request processing pipeline. It shows how the existing middlewares are ordered and where custom middlewares can be added.
Creating a custom middleware
Middleware is generally encapsulated in a class and exposed with an extension method and must include:
A public constructor with a parameter of type RequestDelegate.
A public method named Invoke or InvokeAsync. This method must:
Return a Task.
Accept the first parameter of type HttpContext.
For this custom middleware a list of apiKeys values will be passed as a parameter also.
In the method InvokeAsync, the code will check if the header contains the ApiKey, otherwise the next middleware will not be called and an error 401 will be raised.
public class CustomApiKeyMiddleware
{
    private readonly RequestDelegate _next;

    private readonly List<string> _apiKeys;


    public CustomApiKeyMiddleware(RequestDelegate next, string apiKey)
        : this(next, new List<string> { apiKey })
    {
    }

    public CustomApiKeyMiddleware(RequestDelegate next, List<string> apiKeys)
    {
        _next = next;
        _apiKeys = apiKeys;
    }

    public async Task InvokeAsync(HttpContext context)
    {
        string header = context.Request.Headers[Constants.ApiKeyHeaderName].ToString();

        if ((context.Features.Get<IEndpointFeature>()?.Endpoint?.Metadata.Any((m) => m is AllowAnonymousAttribute)).GetValueOrDefault() ||
            !string.IsNullOrWhiteSpace(header) && _apiKeys.Any((k) => k == header))
        {
            await _next(context);
            return;
        }

        context.Response.StatusCode = 401;
        context.Response.ContentType = "text/plain";
        await context.Response.WriteAsync("ApiKey is invalid.");
    }
}
Configuration
Now it is time to add the custom middleware in the pipeline. This is a middleware used to validate an Api key defined in the appsettings then should be called after all other middlewares and before UseEndpoints middleware.
// Configure the HTTP request pipeline.
if (app.Environment.IsDevelopment())
{
    app.UseSwagger();
    app.UseSwaggerUI();
}

app.UseMiddleware<CustomApiKeyMiddleware>(app.Configuration.GetValue<string>("TodoApiKey"));

app.UseHttpsRedirection();

app.Run();
The following code adds the security definition for swagger, this way the authorize button will be visible and it allows users to add the ApiKey before executing the endpoints.
builder.Services.AddSwaggerGen(c =>
{
    c.SwaggerDoc("v1", new OpenApiInfo { Title = "TodoServiceApi", Version = "v1" });

    c.AddSecurityDefinition(Constants.ApiKeyHeaderName, new OpenApiSecurityScheme
    {
        Description = "Api key needed to access the endpoints. ApiKey: ApiKey",
        In = ParameterLocation.Header,
        Name = Constants.ApiKeyHeaderName,
        Type = SecuritySchemeType.ApiKey
    });

    c.AddSecurityRequirement(new OpenApiSecurityRequirement
    {
        {
            new OpenApiSecurityScheme
            {
                Name = Constants.ApiKeyHeaderName,
                Type = SecuritySchemeType.ApiKey,
                In = ParameterLocation.Header,
                Reference = new OpenApiReference
                {
                    Type = ReferenceType.SecurityScheme,
                    Id = Constants.ApiKeyHeaderName,
                },
                },
                new string[] {}
            }
    });
});
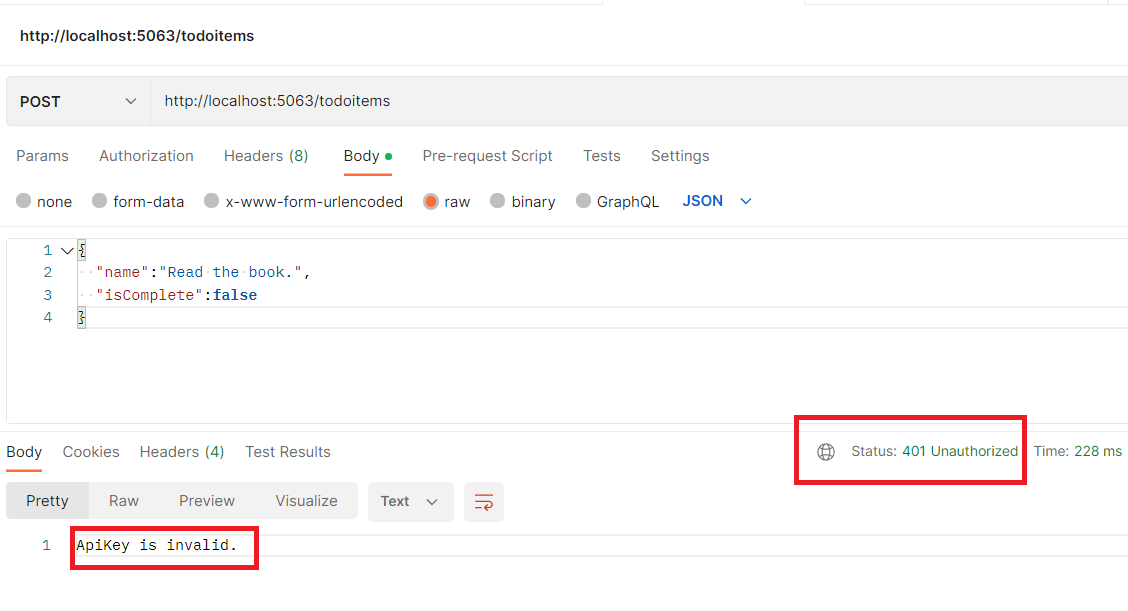
Testing with Postman
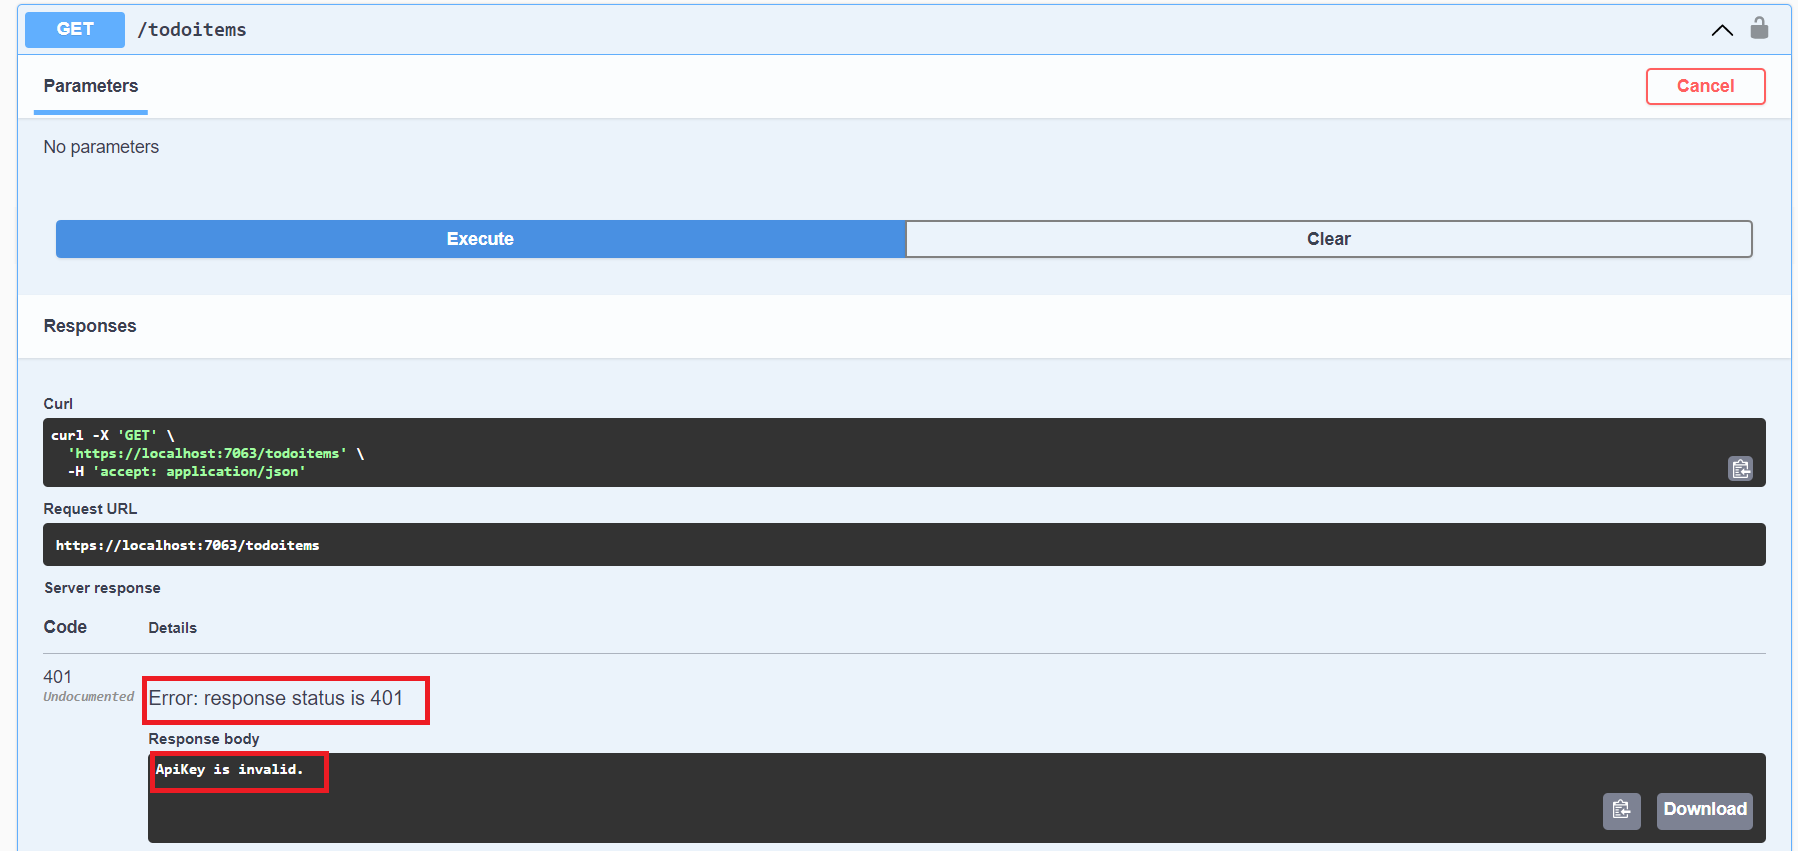
Executing the endpoint without providing an ApiKey will result in unauthorized error as can be seen in the following image.
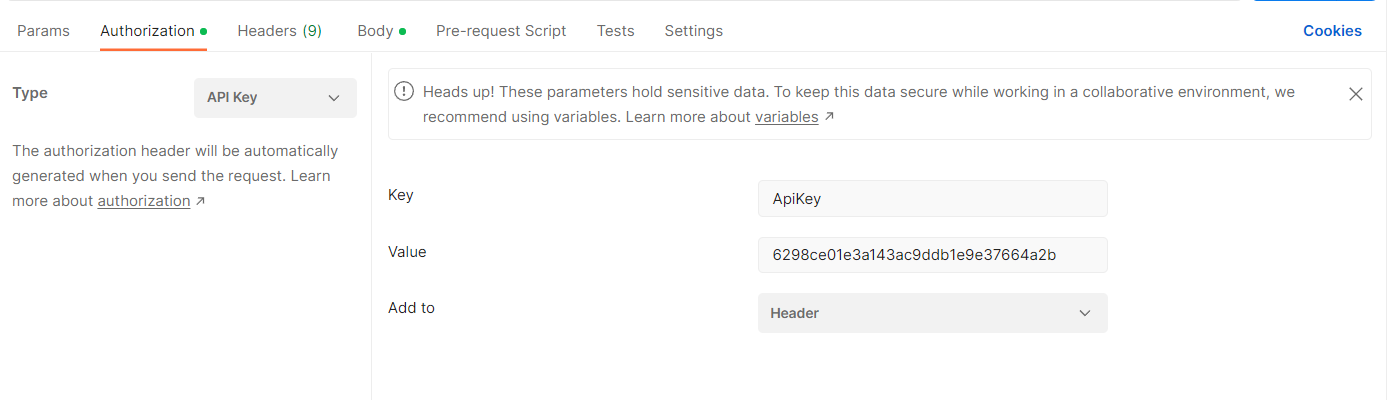
The ApiKey can be added in the Authorization tab, selecting API Key from the Type list and adding the values with the same key and value defined in the Api settings.
Testing with Swagger
The same error will happen with swagger if the API Key is not provided.
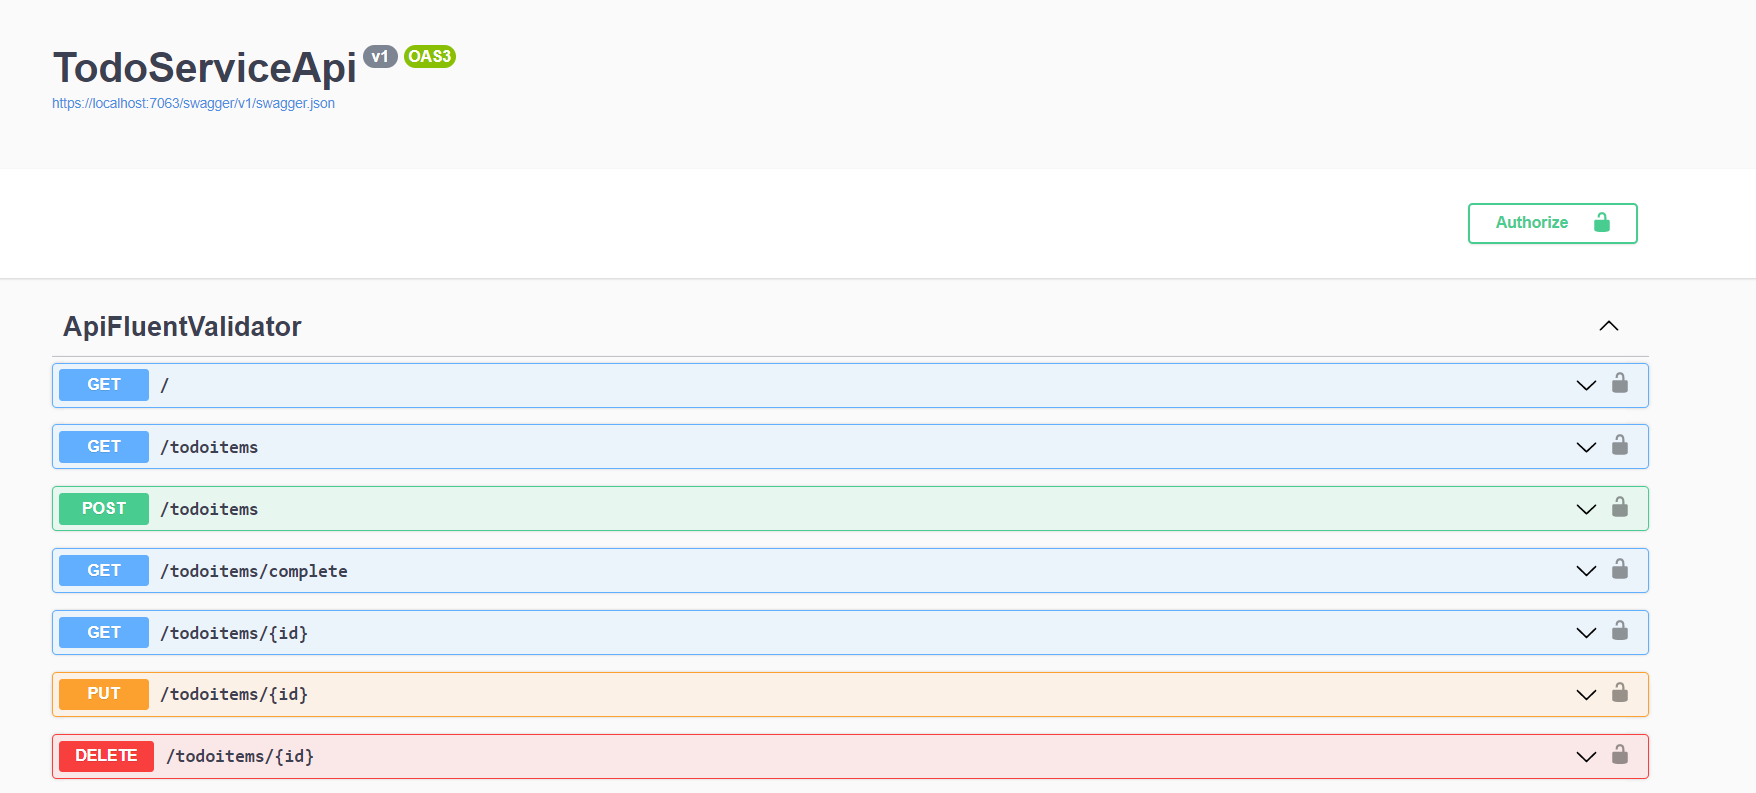
Because a security definition was added in swagger settings through the code, now the authorization page is available. The page can be displayed through the button Authorize at the top of the page or through the lock icon at the header of each endpoint.
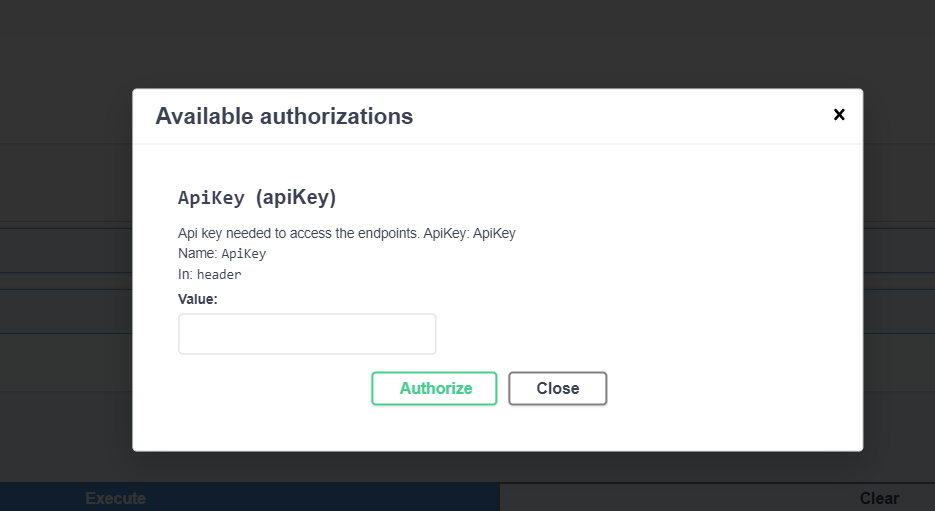
After providing the ApiKey value, the page will be authorized to execute all the endpoints.
Wrapping Up
You can find the full code on my GitHub.